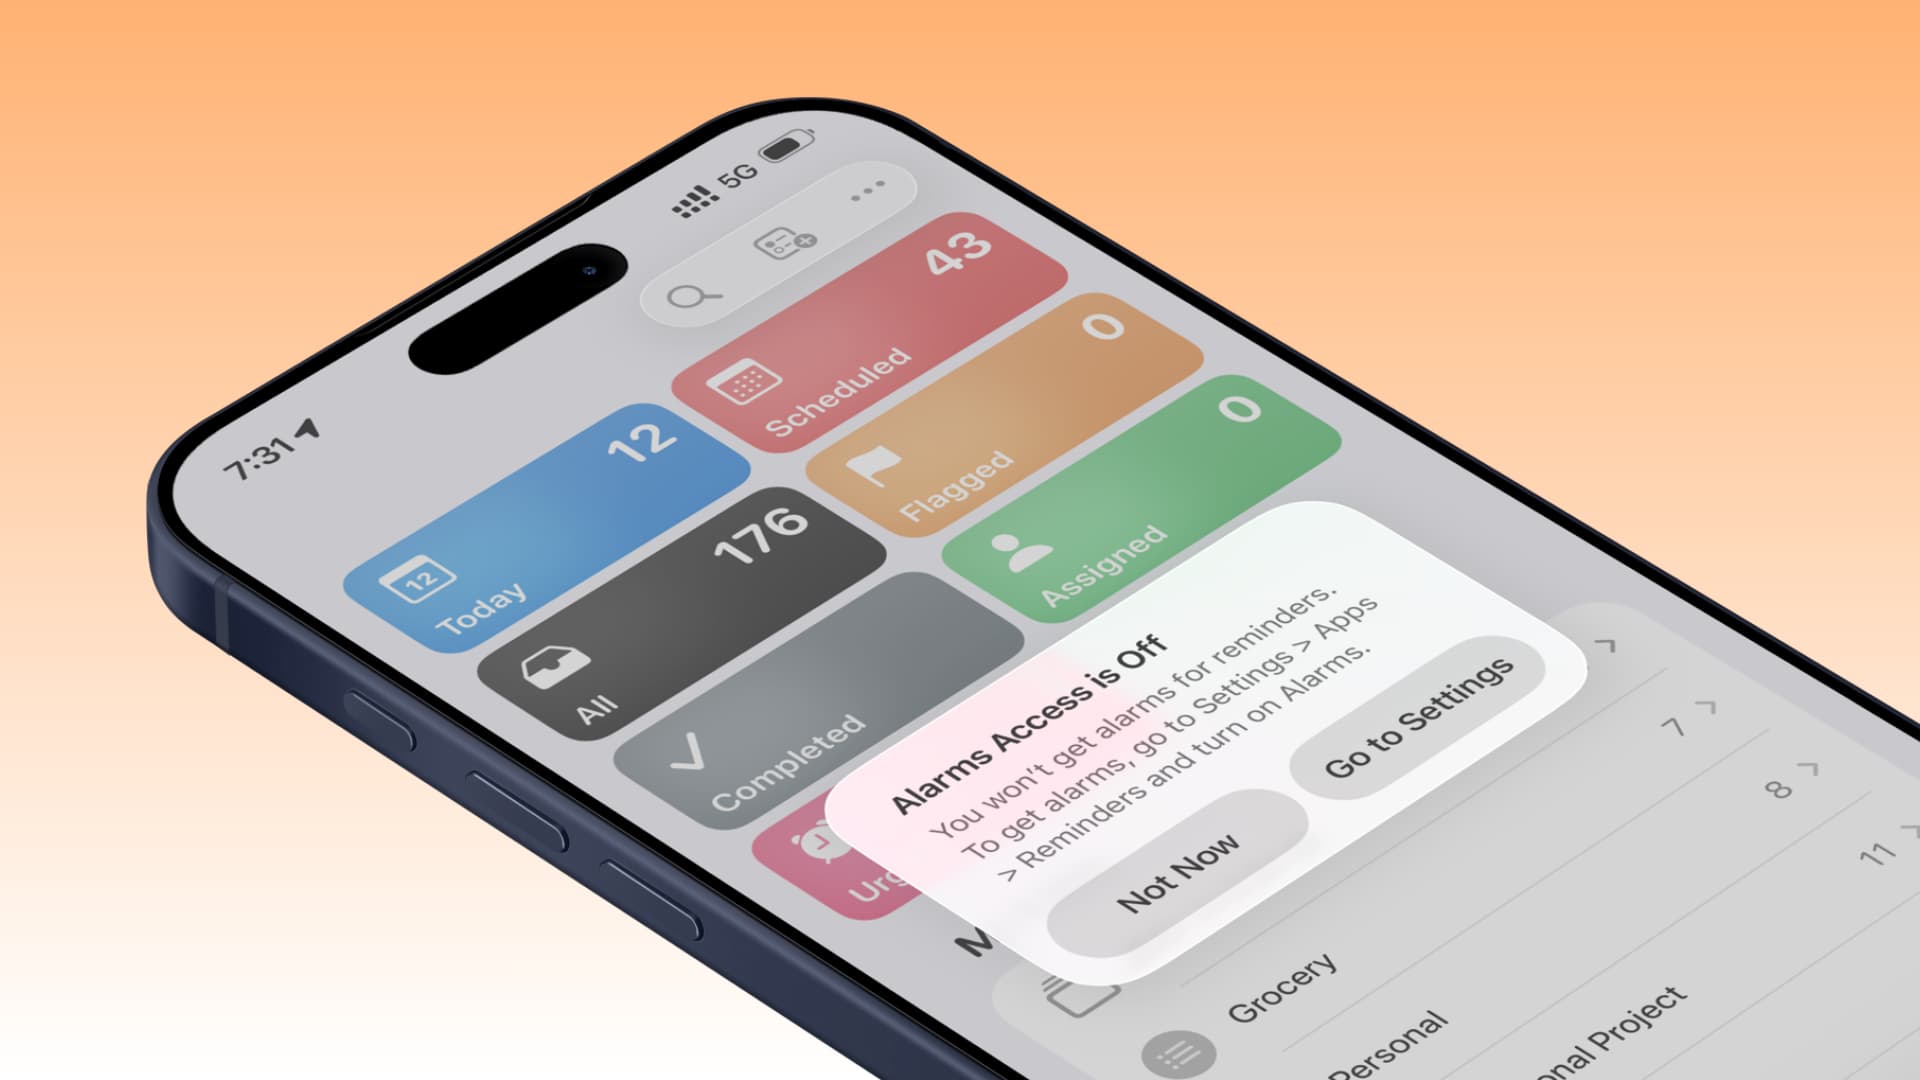
If you are running the latest iOS 26 version on your iPhone and constantly see the "Alarm Access Disabled" pop-up when you open the Reminders app, learn what you need to do.
What is the reason for this?
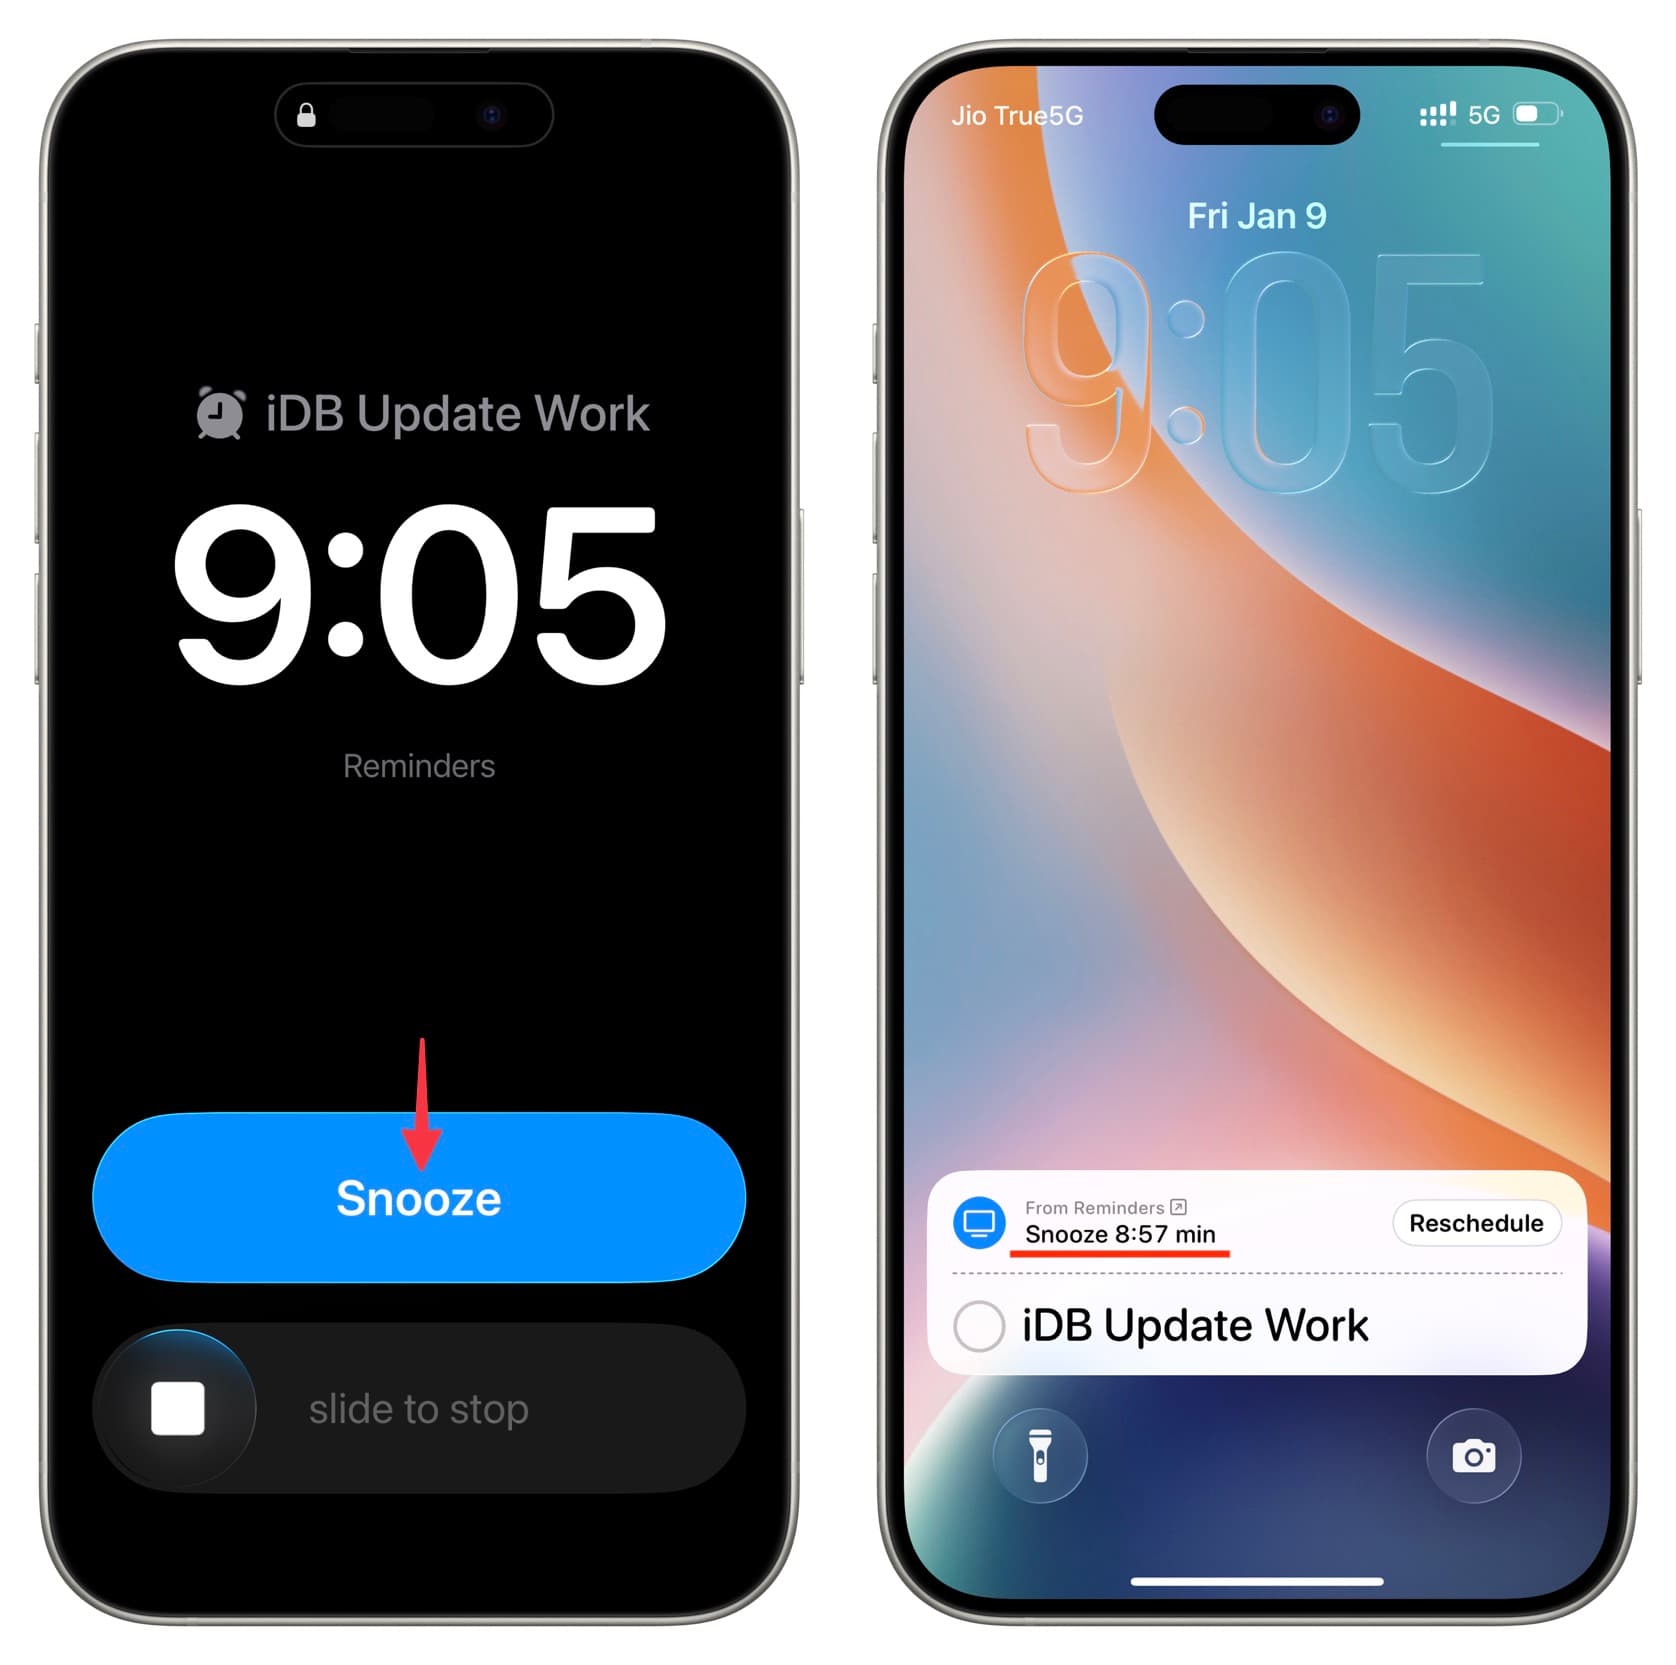
iOS 26.2 and later versions include a thoughtful feature that allows you to set alarms for very important reminders so that you don't miss them. All you have to do is toggle the "Urgent" switch on when adding the task in the iPhone Reminders app.
Using this feature requires the iOS 26 Reminders app to have access permission to your alarms. If you did not grant this permission and still set an urgent reminder with an alarm, you will see the "Alarm Access Disabled" pop-up every time you open the Reminders app.
Here’s how to fix it.
Turn off the reminder alarm
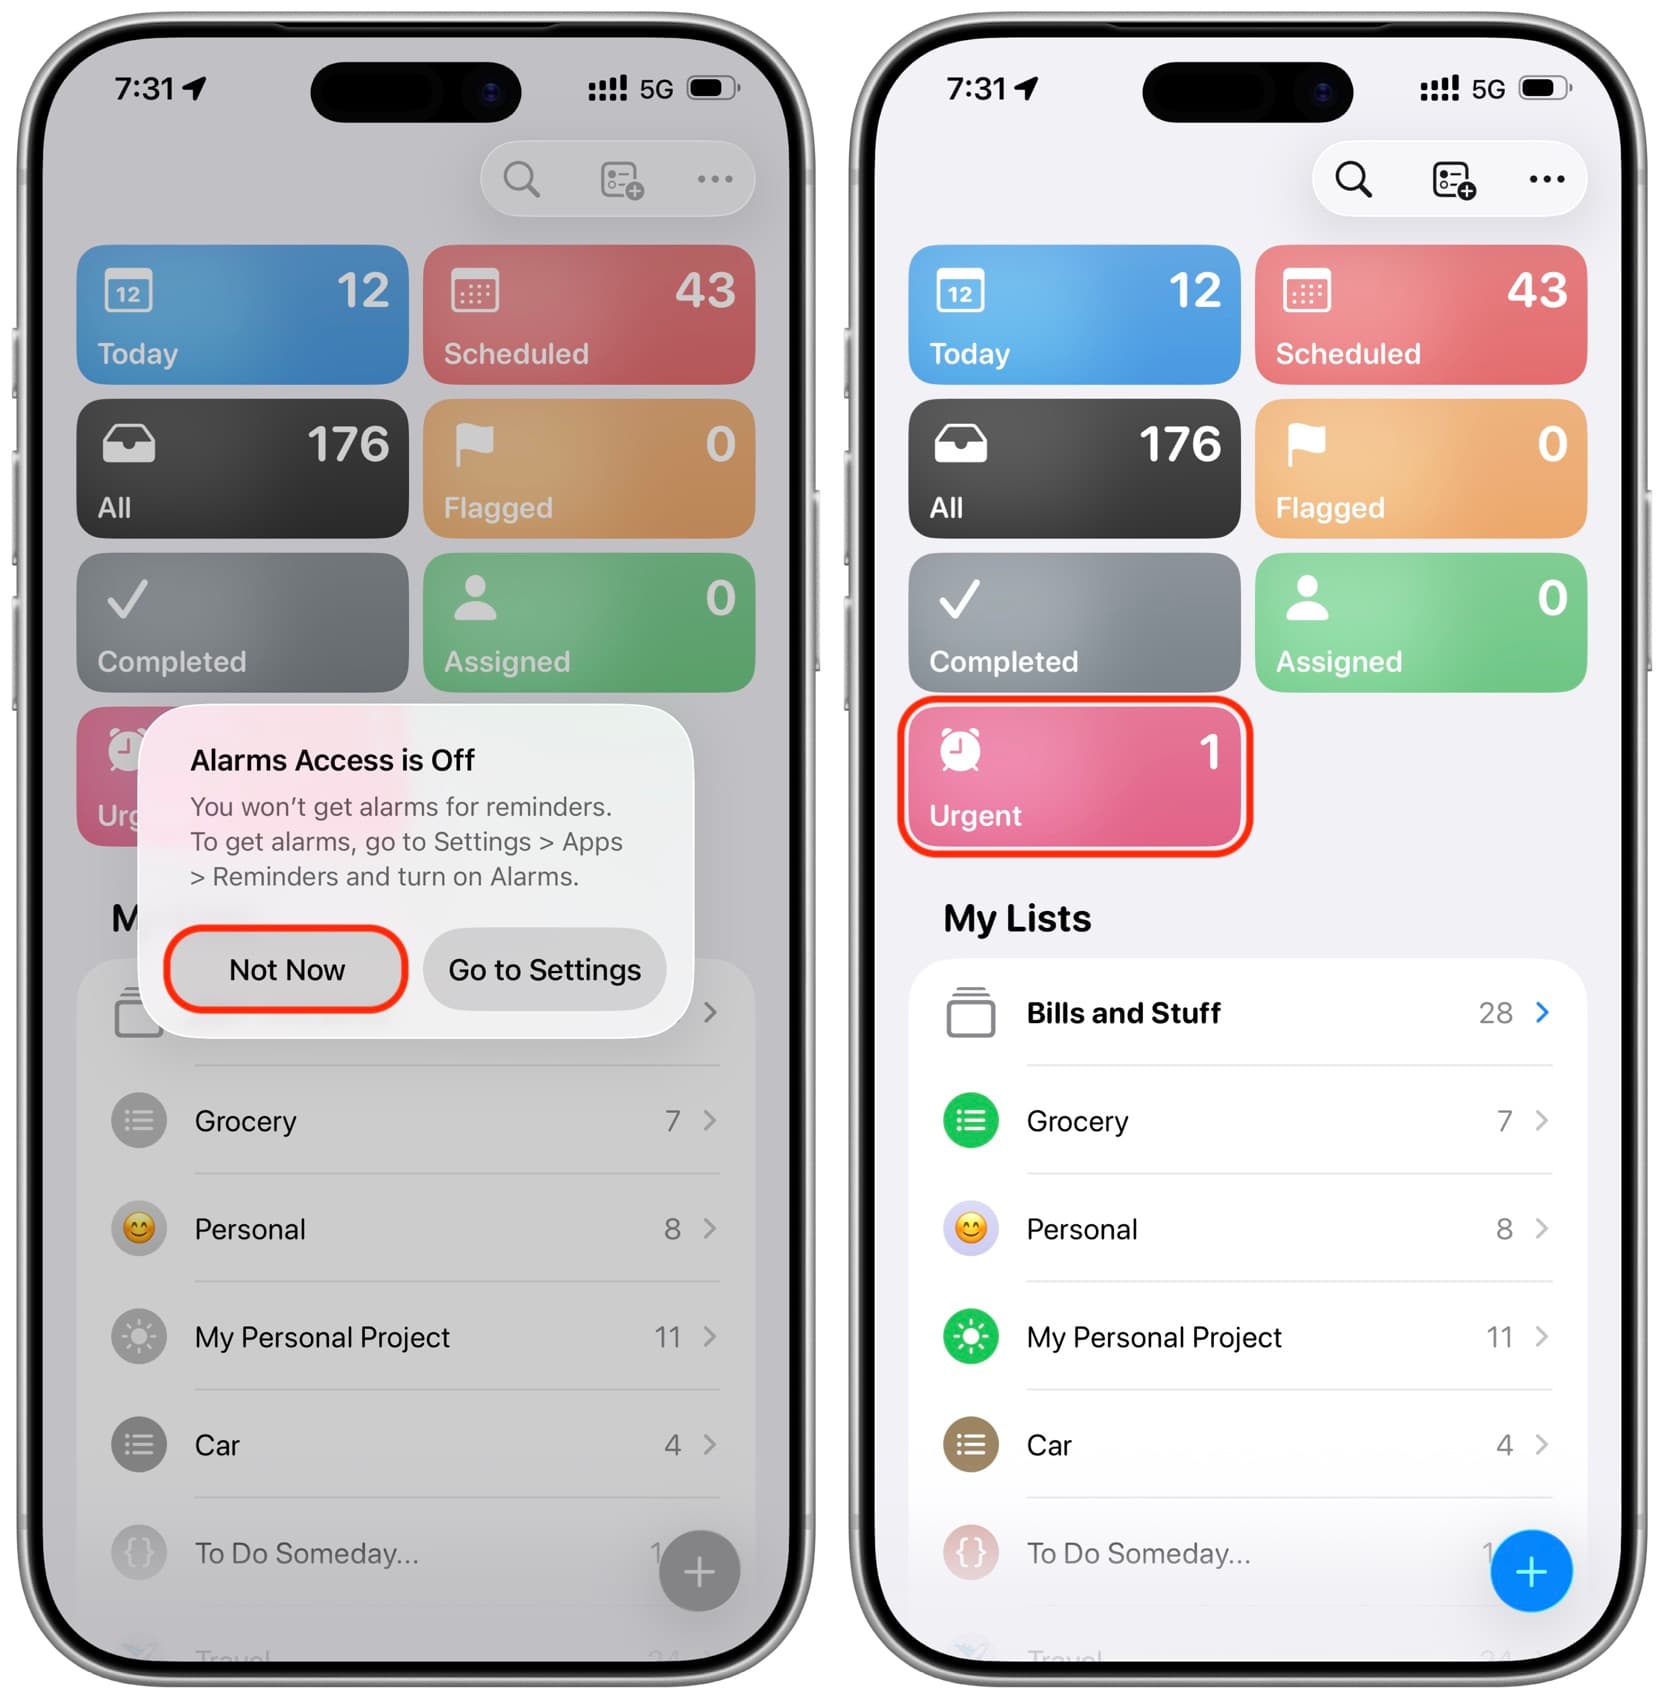
The "Alarm Access Disabled" pop-up only appears if you have enabled the 'Urgent' switch for a reminder, so turning it off will help resolve this issue.
1) Open the Reminders app and tap Not Now in this pop-up.
2) Tap the Urgent box at the top to see all your reminders that contain alarms. If you do not see the Urgent box, proceed to the next solution step.
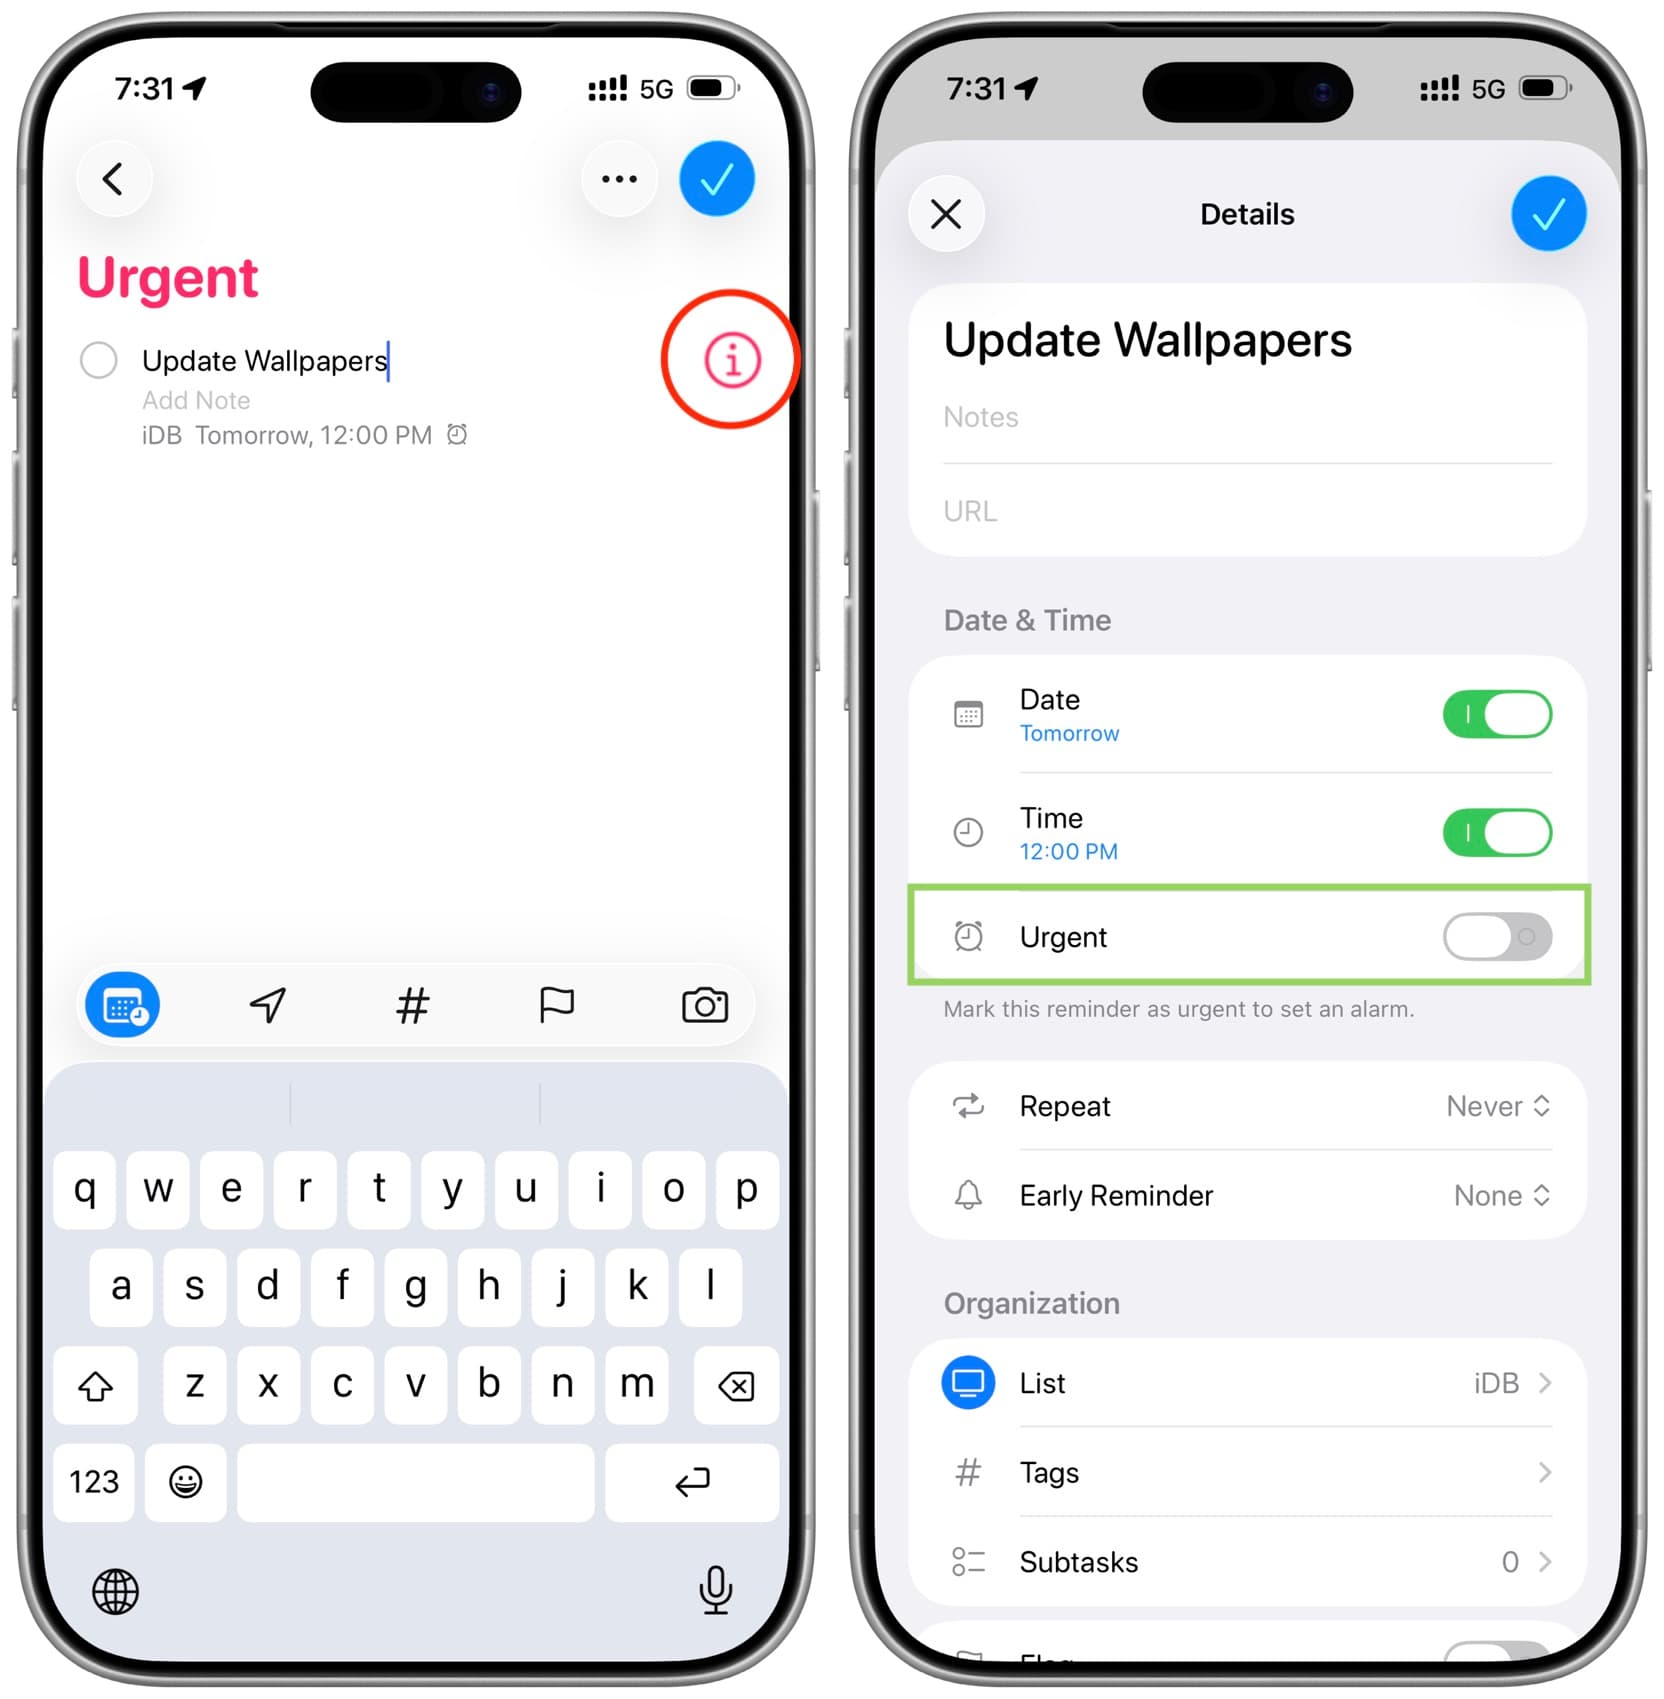
3) Tap on the added task and then tap the info button ⓘ next to it.
4) Turn off the Urgent switch and tap the checkmark to save this reminder without an alarm.
5) Now force close the Reminders app and reopen it; you will no longer see the "Alarm Access Disabled" pop-up.
Allow access to alarms
If you want to use reminder alarms, follow these steps to allow the Reminders app access to Alarms. Doing this will ensure that you receive loud notifications when an important task is due, and the "Alarm Access Disabled" pop-up will never appear again.
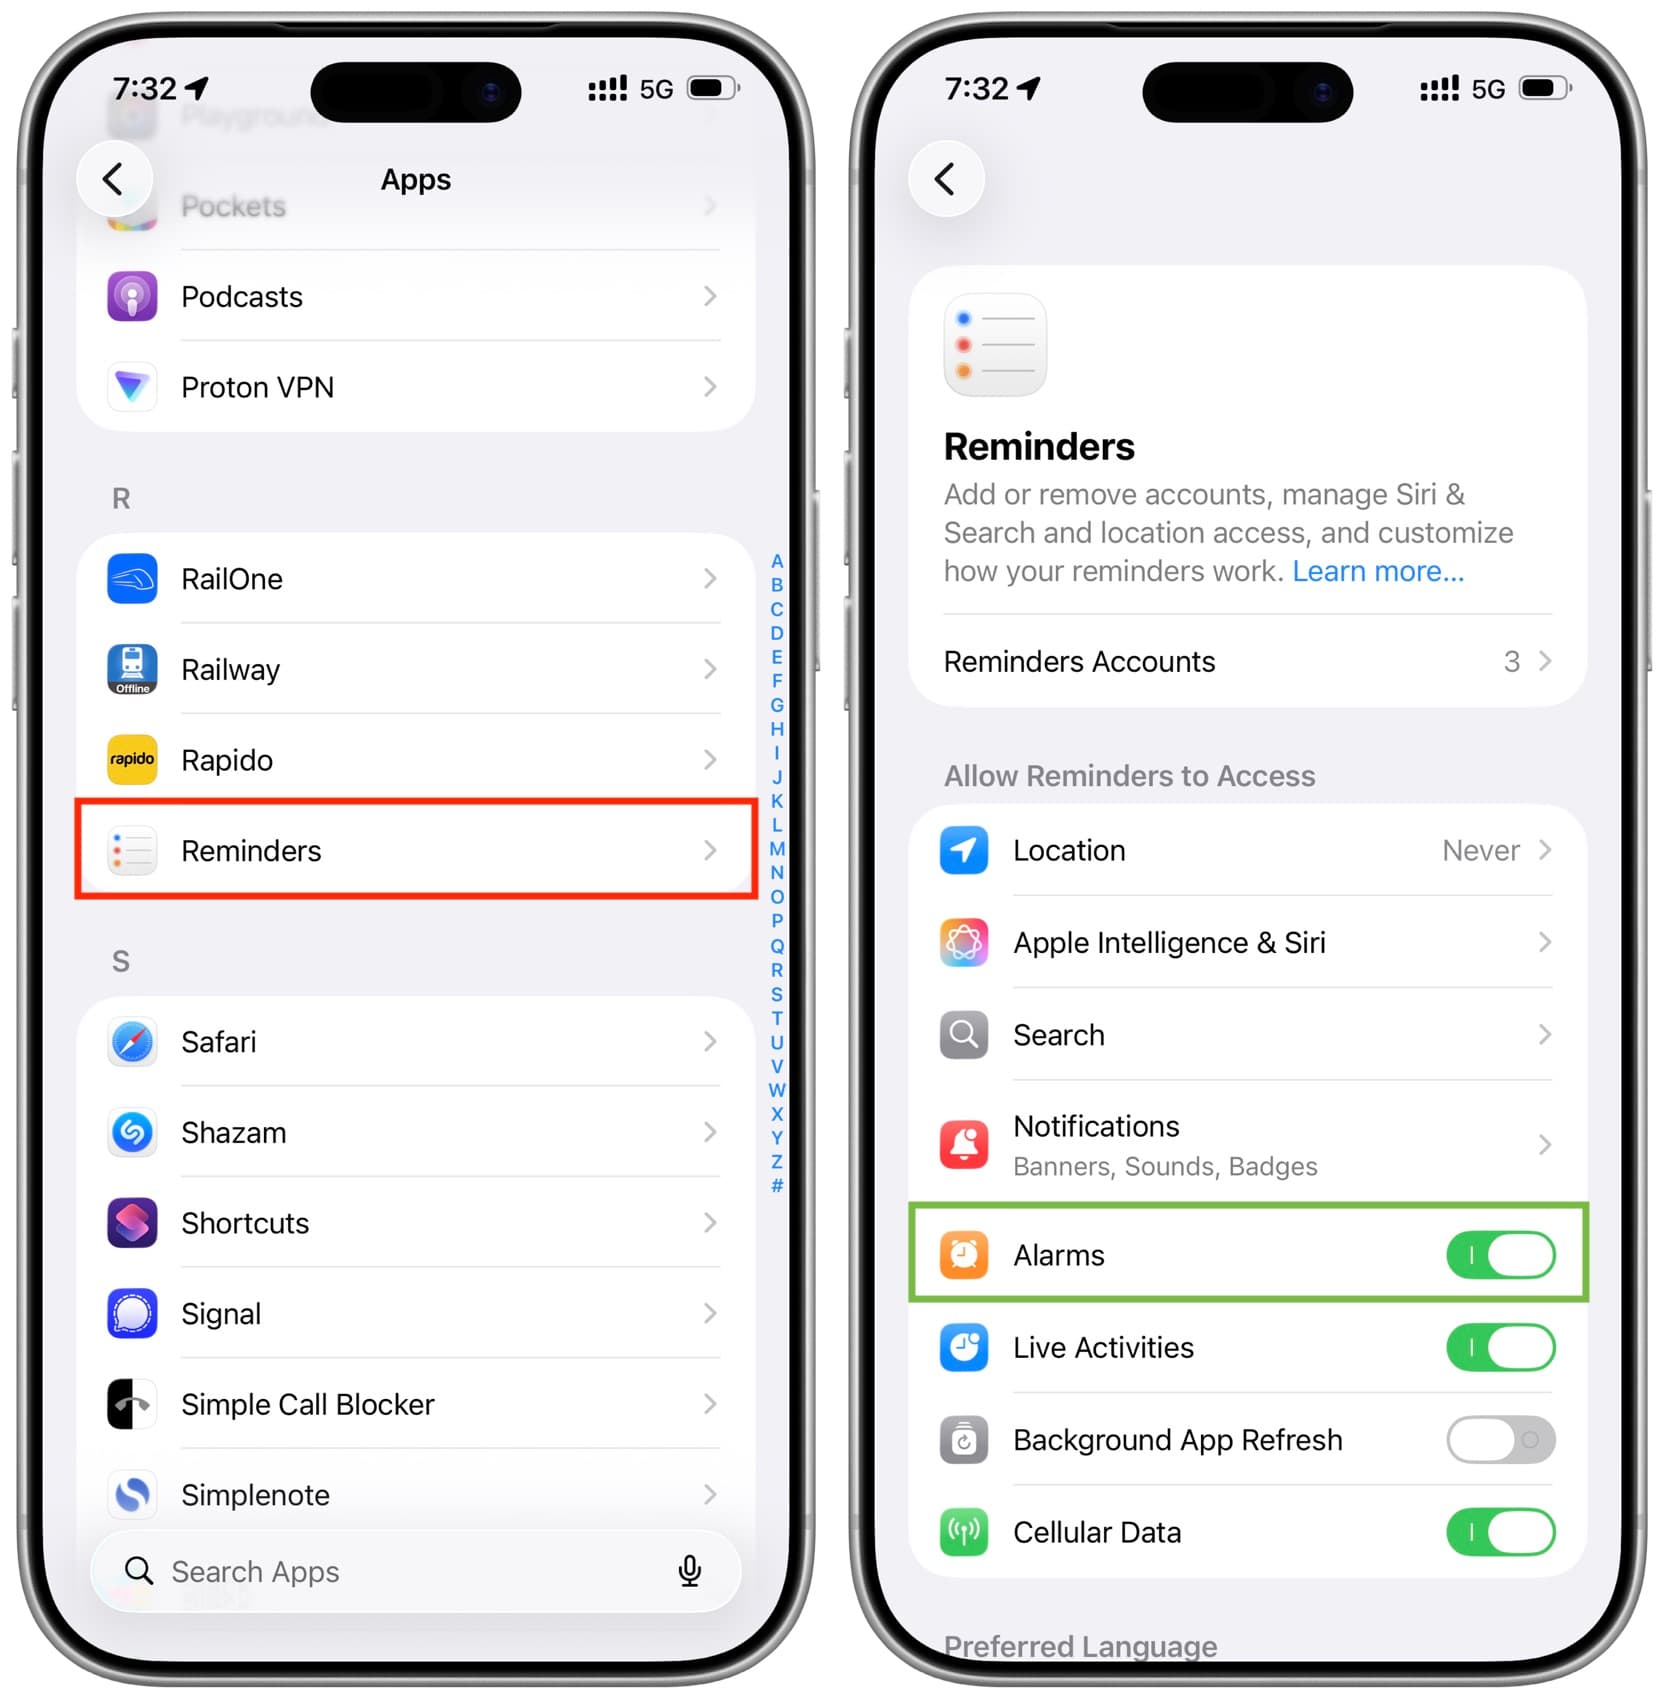
1) Open the iOS 26 Settings menu and tap on Apps at the bottom.
2) Select Reminders from the app list.
3) Toggle the switch next to Alarms on.
4) Force close the Reminders app and reopen it; the pop-up will not appear again.
Restart your iPhone
If you have followed one of the above steps but still see the pop-up, it may be due to a temporary glitch. You can simply fix this by turning your iPhone off and back on.
Also, make sure that your device is running the latest iOS 26 version.


Comments
(3 Comments)